
Creating and Editing Forms
Forms let you collect information from your clients in a structured way, from a first intake questionnaire to a consent agreement or a weekly check in.
Everything a client submits saves straight to their record, so you always have it on hand.
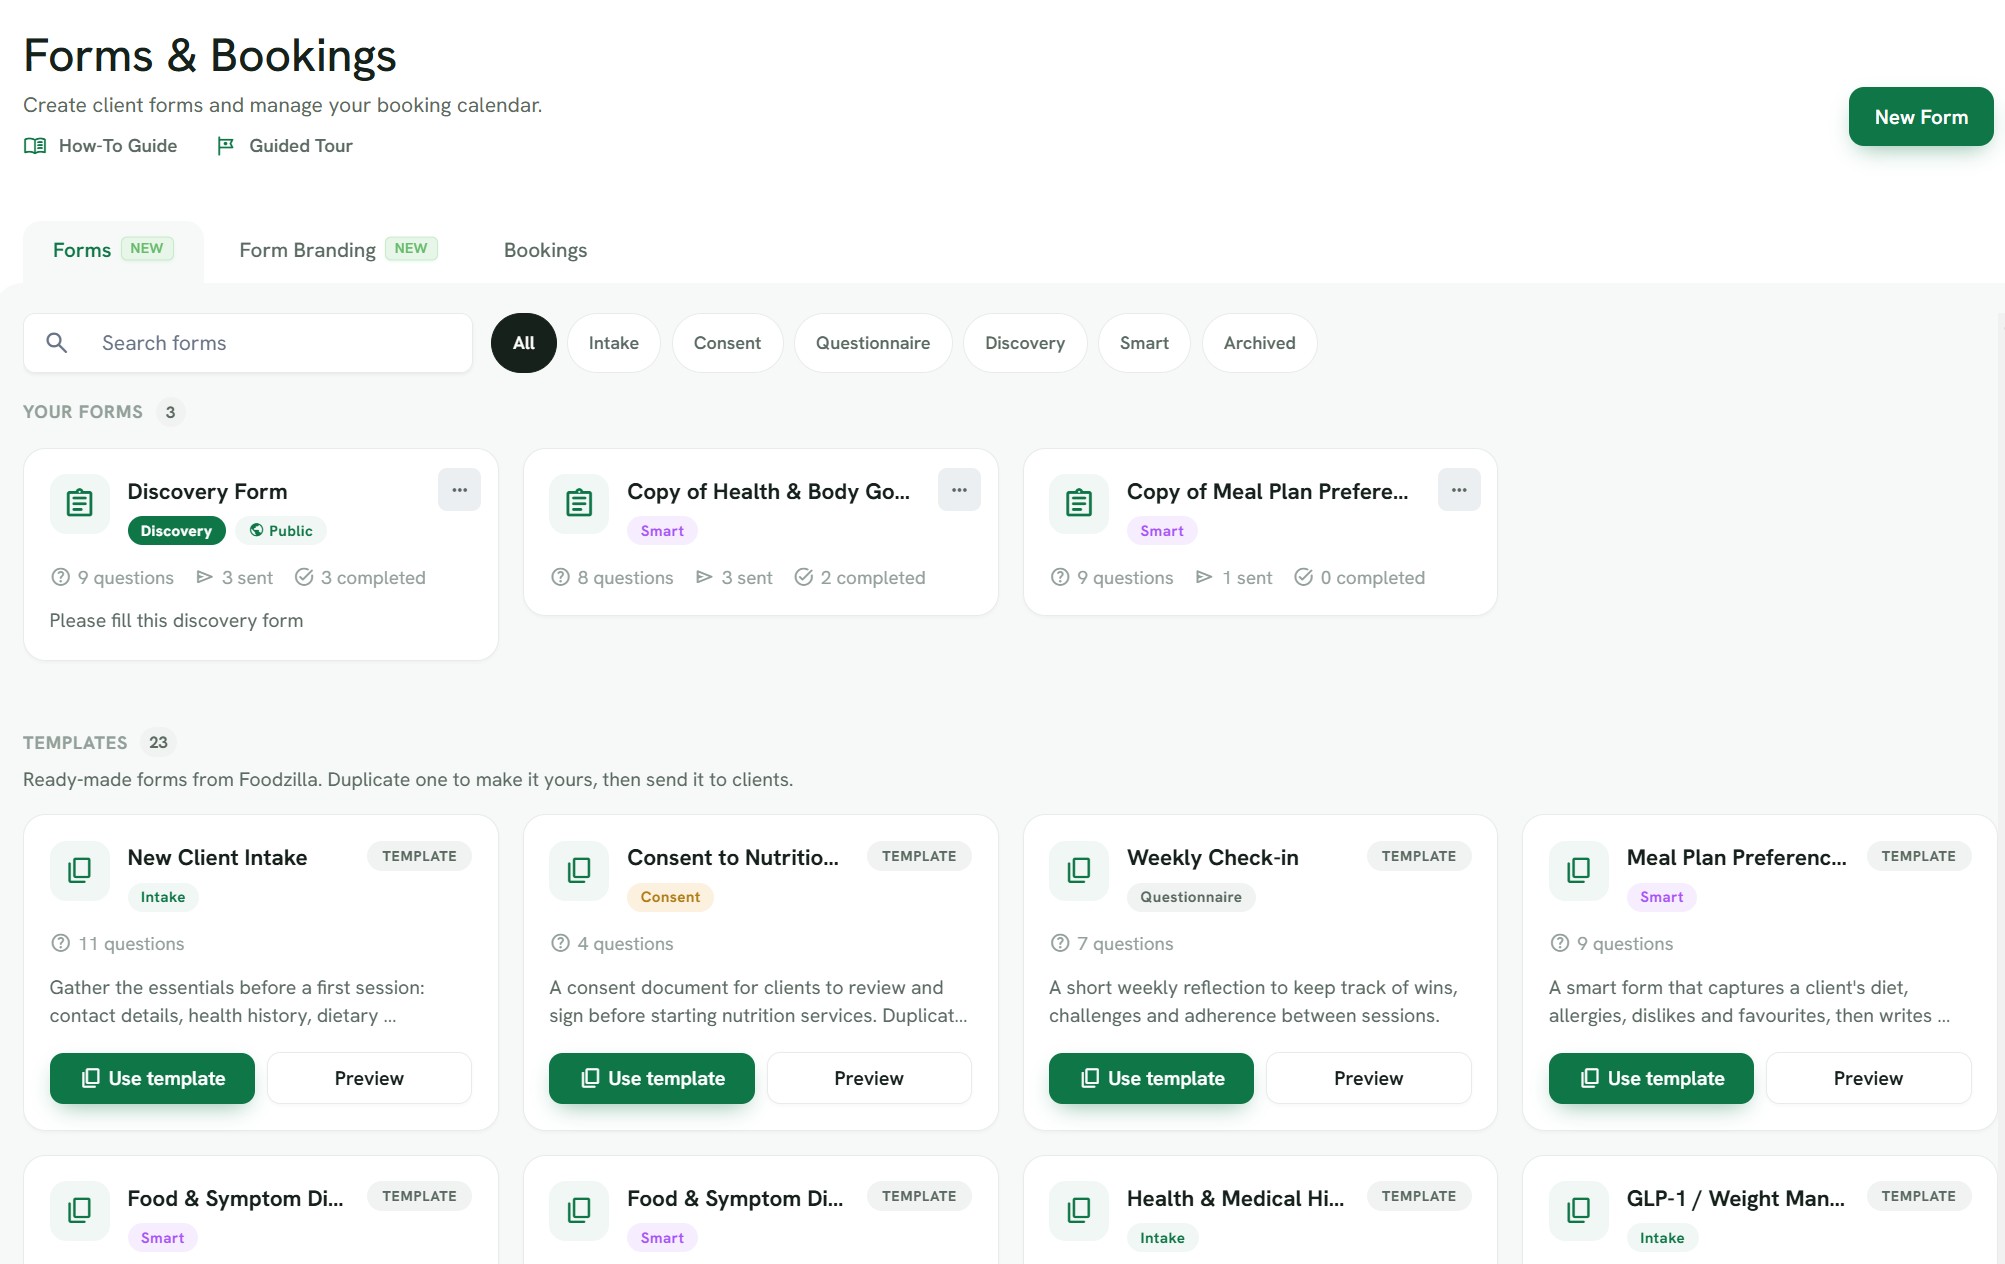
Where to find Forms
Open Forms & Bookings from the main menu and stay on the Forms tab.
This is home base for everything to do with forms: the ones you have built, the ready-made templates, and the responses that come back.
Starting a new form
You have two ways to begin.
Start from a template. Scroll to the Templates section and pick one of the ready-made forms. There are 23 to choose from, covering client intake, consent, weekly check-ins, health history, and more.
Templates cannot be edited directly, so when you find one you like, choose Use template to make your own copy. From there it is yours to change.
Start from scratch. Click New Form at the top of the page.
You get a blank form to build up question by question.
Filling in the form details
Every form starts with a few basics at the top:
- Form title. This is what your client sees, so keep it clear, for example "New Client Intake" or "Weekly Check-in".
- Type. Choose whether the form is an intake, consent, questionnaire, or discovery form. The type helps you filter and organize your forms later.
- Description. Optional. A short line under the title that tells the client what the form is for.
- Auto send to new clients. Turn this on if you want the form to be sent automatically every time you add a new client. It is a nice way to make sure intake happens without you having to remember.
Adding questions
Click Add question and choose the type that fits what you are asking:
- Short text and long text for open written answers.
- Number for things like weight or age.
- Date for dates of birth, event dates, and so on.
- Single choice, multiple choice, and dropdown for questions with set options.
- Scale for rating questions, such as "How would you rate your sleep from 1 to 10?".
- Yes or No for simple either-or questions.
- Signature when you need the client to sign, which is handy on consent forms.
- Info block for a note or instruction that the client reads but does not answer.
For each question you can add a title, an optional helper line underneath, and mark it as required if the client must answer it before submitting. Questions with options, like choices and dropdowns, let you type in each option.
Reordering and removing questions
Use the up and down arrows on a question card to move it. To remove a question, open its menu and delete it. If you collapse questions while you work, you can expand them all again from the Expand all control at the top of the questions list.
Previewing before you save
Switch to the Preview tab at any time to see exactly what your client will see. Anything you type into the preview is just for testing and is not saved, so feel free to click around.
Saving
When you are happy, click Save. If something needs attention before the form can be saved, for example a question that is missing a title, you will see a message explaining what to fix, and the page will bring that message into view so you know exactly where to look.
Editing a form later
Open any form you have created and make your changes, then save again. A couple of things worth knowing:
- If you started from a template, you cannot edit the original. Duplicate it first, then edit your copy.
- If a form is archived, saving your edits will not bring it back to life. Archived forms stay archived until you choose to reactivate them, which keeps their status predictable.
A note on plans
Building and sending forms is a Pro feature. If you are on a lower plan, you will be prompted to upgrade when you try to create or send one.